Author Archives: Domain Bird Support

Essential Steps for Plastering a Wall Like a Pro in 2024

Plastering walls has been a tried and true technique for ages that gives you smooth, sturdy surfaces ready for paint or wallpaper. With the right stuff and methods, plastering a wall yourself to look pro is totally doable. This detailed … Continue reading

Plastering a Wall

Plastering walls has been a tried and true technique for ages that gives you smooth, sturdy surfaces ready for paint or wallpaper. With the right stuff and methods, plastering a wall yourself to look pro is totally doable.

This detailed guide lays out all the perks of plaster walls and walks you through a foolproof process to plaster like a boss.

Why Plaster Your Walls?

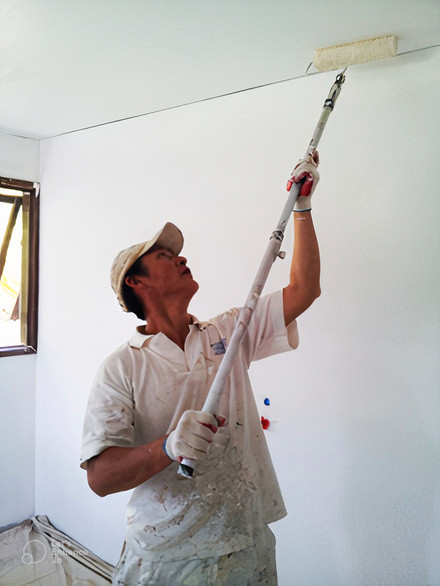
Plastering walls is old school but still rad for making walls smooth and tough for painting or wallpaper. With the right materials and know-how, you can totally plaster a wall yourself and make it look professionally done. For those who prefer to leave it to the experts, residential painting services can provide a seamless and polished finish.

Why Plaster Your Walls

Let’s break down all the awesomeness of plaster walls and show you how to pull it off like a master plasterer.

  • Seamless Look – Plaster can conceal imperfections and create a continuous smooth surface free of seams, nails, or joints. The flawless appearance works well with contemporary design.
  • Extreme Durability – Once fully cured, plaster is incredibly hard and resistant to cracks and dents. Plaster stands up to kids, pets, and daily wear-and-tear better than drywall alone.
  • Fire Resistance – The gypsum in plaster makes it naturally fire resistant. This added safety benefit is ideal for kitchens, fireplace surrounds, or basement spaces.
  • Sound Dampening – The density and mass of plaster help block sound transmission through walls. It’s useful for reducing noise transfer in bedrooms, nurseries, and home theatres.
  • Design Flexibility – Plaster readily accepts any type of paint or wall covering. The neutral surface unleashes unlimited potential for colours, textures, patterns, or specialty finishes.

Materials Needed for Wall Plastering

Doing the plastering yourself can save some serious cash instead of hiring a specialist. But having the right stuff is key to nailing it. Plastering needs certain ingredients to get a smooth, long-lasting finish. We’re talking the plaster, tools, and accessories for mixing, putting it on, and perfecting it.

Just get your hands on these crucial supplies and you can do this! Here is a checklist of plastering materials needed:

  • Premixed lightweight plaster or joint compound
  • Joint tape – fibreglass or paper
  • Paint tray, roller covers, paint brushes
  • Drywall taping and joint knives
  • Sandpaper – 80 to 120 grit
  • Primer/sealer
  • Interior paint
  • Plastic drop cloths
  • Plastic sheeting
  • Masking tape
  • 5 gallon bucket
  • Mixing stick or paddle
  • Plastering trowels
  • Clean sponges
  • Safety gear – gloves, glasses, mask

The most important item is high-quality, pre-mixed lightweight plaster compound. Avoid heavy, old-fashioned plaster. Hardware stores carry versatile modern plaster products designed for simple DIY application. Gather all materials ahead of time for a smooth plastering process.

Step-by-Step Guide to DIY Plaster a Wall

Trying a plastering project on your own can feel really hard. But it’s easier if you break it up into clear sections. With the right planning and methods, you can make your walls look just as good as a professional. Adopting the techniques means you’ll be well on your way to smooth, durable plastered walls without any plastering experience.

Follow these key steps to achieve flawless plastered walls:

Preparation

  • Remove any wallpaper or loose paint completely using water and a scraper.
  • Fill small cracks and holes with joint compound. Allow to dry and sand smooth.
  • Clean dirt, grease, and oils using TSP cleaner and water. Rinse thoroughly.
  • Cover floors, baseboards, outlets, and furniture with plastic sheeting. Drape drop cloths to protect adjacent walls and ceilings.

Mixing the Plaster

  • Always start with a clean bucket and water to prevent contamination.
  • Add powder to water slowly while stirring constantly to avoid lumps. Don’t pour water into the plaster.
  • Mix to a smooth, lump-free consistency like pancake batter. Thin with more water for skim coats.

Applying the First Coat (Scratch Coat)

  • Paint undiluted PVA glue onto the wall and allow it to fully dry. This helps bonding.
  • Trowel on a 2mm thick layer of plaster, pressing it strongly into the surface.
  • Scratch the plaster with grooves for the second coat before it dries completely.

Applying the Second Coat (Finish Coat)

  • Mix plaster slightly thinner than the first coat.
  • Trowel over the grooved scratch coat using sweeping motions from top to bottom.
  • As it starts to set up, glide the trowel to smooth and flatten any high spots.
  • Fill voids and blend touch-ups to create a continuous surface as it dries.

Finishing Touches

  • Once dry, sand out any tiny rough areas using fine-grit sandpaper. Wipe away dust.
  • Allow plaster to cure fully for 30 days before painting or applying wallpaper.
  • Primer and paint provide an attractive durable finish. For added protection, apply a sealing plaster varnish over paint.

Pro Tips for Flawless Plaster

  • Maintain a wet edge and blend sections together before the plaster dries.
  • For inside corners, glide the trowel diagonally from each wall to meet neatly.
  • Room temperature plaster will set up and dry the fastest. Cold plaster may remain damp and prone to cracking.
  • Work quickly but carefully to keep plaster smooth before it hardens.

Get Professional Plastering in Sydney

Professional Plastering Services

If you want gorgeous plaster walls and ceilings that are perfect in professional painting services in Sydney, you can depend on the pros at A One Korean Painting. Our plastering team is highly trained with solid and legitimate years of experience.

Our key qualifications include:

  • High Quality Craftsmanship – Our plasterers take great pride in our work and won’t cut corners. You can expect perfectly smooth finishes.
  • Any Plastering Task – We handle new installations, repairs, skim coating, veneer plaster, ornamental plaster, and more. No job is too big or small.
  • Customised Service – We will listen to your plastering needs and goals for the space. Our work is customised to match your vision.
  • Efficient and Timely – The team works diligently to complete plastering efficiently without sacrificing quality. We get the job done on schedule.
  • Professional Clean Up – Not only will you get impeccable plaster work, but we thoroughly clean the space afterwards leaving no trace of mess.
  • Reliable Results – With many years of experience, we deliver dependable plastering you can trust will stand the test of time.

Transform your home or business by calling the plastering pros at A One Korean Painting today. Our artistry with plaster is second to none. Contact us now for a free quote!

Posted in Painting Guide | Leave a comment

Why Winter Is the Perfect Time for Exterior House Painting

Planning to paint your house but unsure when the perfect time is to do it? As homeowners, timing is often overlooked but important when planning to do major house improvements. Exterior house painting is one of them. So when do … Continue reading

Exterior Painting in Winters

Planning to paint your house but unsure when the perfect time is to do it? As homeowners, timing is often overlooked but important when planning to do major house improvements. Exterior house painting is one of them.

So when do you think is the best time to repaint your house and what factors are to be considered?

This post will demonstrate why winter may be the most suitable season to paint your exteriors, which may come off as a little unexpected to you.

Why Paint Your Exteriors in Winter: Top Reasons

Here are some reasons why we think winter is the best time to paint alongside the benefits of exterior painting during this season.

Lower humidity levels for better paint adhesion

There is lower temperature during the winter season, therefore, the humidity levels are also low.

When there is extreme humidity, paint has the tendency to peel or bubble. This affects paint adhesion. However, during winter time, the air is drier and paint can adhere better to surfaces resulting in a smoother and more durable finish.

Faster paint drying times in cold, dry air

Contrary to what most people believe, cold air can accelerate the paint-drying process. Although it can be challenging to dry paint in extreme cold, most winter days offer optimal conditions for drying.

Due to the absence of moisture in the air, winter allows for the paint to dry faster. It also reduces the risk of uneven coats. An efficient painting process means you will complete your project in a shorter time and you can enjoy your home earlier than expected.

Contractors’ availability during the offseason

Winter is off-season for painters which means that you can easily hire painters. This is an advantage for homeowners as there is flexibility with the contractors availability.

It also means that contractors can be more focused on their projects because there is no pressure on their schedules.

Tips for Exterior House Painting During Winter

Tips for Exterior House Painting During Winters

There are some considerations to take note of when painting the home exterior to ensure that you achieve the best results.

Here are some tips to keep in mind:

Use cold-weather paint formulas

There are paints that are formulated for low temperatures. They are the best to use during winter because they were formulated to cure in this weather. When deciding to do a painting project in winter, check that the paint you are about to purchase is suitable for the winter season.

Start early to take advantage of warmer temperatures

Winter days are shorter, that’s why it is best to start your painting project at the earlier part of the day to take advantage of the warmer temperatures.

The temperatures peak during midday and can help to dry the paint properly. Try your best to finish by mid-afternoon so that there is enough time to dry the area before the temperature drops again.

Monitor weather forecasts for optimal painting conditions

Check the weather forecasts before starting your house painting project. There are days with dry and mild conditions that are perfect timings to paint. Avoid days with high winds, snow, or rain as they can affect paint adhesion and delay the completion of your project, overall.

Provide adequate surface preparation for paint adhesion

Regardless of the season, proper surface preparation is vital to good-quality painting. It is important to ensure that surfaces are clean, dry and free of any debris or mildew during winter and scrape off any old, peeling paint. Remove uneven areas using sandpaper and thoroughly clean the exterior so the paint will adhere and last longer.

Consider using heaters or insulated enclosures

If you’re facing particularly cold temperatures, using heaters or insulated enclosures can help maintain an optimal temperature for painting.

Portable heaters can keep the air warm enough to prevent the paint from freezing and ensure proper drying. Alternatively, creating insulated enclosures around the area you’re painting can help trap heat and protect the paint from adverse environmental elements.

Hire Professional Exterior Painters in Sydney

While painting the exterior of your house in the winter can be a do-it-yourself project, working with Sydney’s top exterior painters can give you peace of mind and guarantee a perfect finish. Experts can handle the particular difficulties of winter painting because they have the training, resources, and expertise.

They can also offer insightful guidance on the best paints and painting methods for your particular project. You can save time, steer clear of potential problems, and take pleasure in a beautifully painted home that withstands the weather by hiring professionals.

Conclusion

While winter may not seem like the best season or temperature to paint the outside of a house, there are a few benefits that make it a viable option. Winter might be a great time to update the exterior of your house because of the lower humidity, quicker drying times, and more contractor availability.

You can obtain a high-quality paint job that protects your home from bad climate conditions and improves its curb appeal by following a few easy recommendations and hiring professional painters in Sydney.

If you highly consider the latter, A One Korean Painting offers professional painting services in whatever season you may need them. Give your house a fresh new look even during winter with our expert exterior painters!

Posted in Painting Guide | Leave a comment

Against the Elements: Best Practices for Painting in High Humidity

Painting is one of the easiest ways to improve the look of any space, providing a fresh, clean appearance. However, high humidity presents some challenges for painting due to the abundance of moisture in the air. Without proper precautions, humidity … Continue reading

Painting in High Humidity

Painting is one of the easiest ways to improve the look of any space, providing a fresh, clean appearance. However, high humidity presents some challenges for painting due to the abundance of moisture in the air.

Without proper precautions, humidity can severely undermine paint jobs, leading to any number of issues both during and after painting.

Challenges for House Exterior and Interior Painting in Humid Weather

High humidity creates prime conditions for interior and exterior painting projects to encounter numerous problems during and after application. Painters must be aware of the main issues excessive moisture can cause.

When humidity levels rise, potential difficulties include extended drying times, increased risk of mildew and mould growth, adhesion loss leading to flaking and peeling, an abundance of water spots, and prevalent paint blistering. Careful preparations are required to mitigate these challenges.

Extremely Extended Drying Times

One major difficulty humidity causes is how to dry paint in high humidity and curing times for paints. With substantial ambient moisture in the air, paint layers take significantly longer to dry and fully cure compared to painting in dry conditions.

During this elongated process, the paint remains soft and highly vulnerable to scuffs, scratches, dirt pick up and other damage. High humidity can lengthen drying times dramatically – sometimes more than doubling or even tripling the standard duration stated on paint labels.

Increased Risk of Mildew and Mould Growth

The inherent dampness in humid air produces ideal conditions for unchecked mildew and mould growth to spread rapidly across surfaces, which can irreparably ruin paintwork.

Even small elevated amounts of moisture allow mildew and mould spores to swiftly propagate across walls, ceilings, and other areas. This necessitates extensive remediation including painting over affected areas. Dark, humid indoor spaces readily facilitate fast mould growth.

Paint Adhesion Problems

Many exterior substrates like wood, concrete, stucco and others are inherently porous and absorb ambient moisture from the air when humidity is high. This absorbed moisture then becomes trapped between the surface and fresh applied paint layers.

It severely interferes with proper paint adhesion, leading to blistering, cracking, peeling, or complete paint delamination exposing the raw surface underneath.

Potential for Water Spots

With chronically high humidity levels, condensation forms on surfaces while ambient moisture also penetrates into porous building materials. This moisture then becomes sealed under new paint layers if they are applied over affected damp surfaces.

Eventually the moisture evaporates after drying begins, leaving clearly visible water spots marring the painted surface. This requires repainting water-damaged areas.

Blistering and Peeling of Paint

Excess moisture that becomes trapped under exterior paint layers tries to push through and compromise the coating over time. It results in paint blisters forming that eventually rupture, peel and flake away exposing the substrate.

This paint failure can happen soon after application or even months or years later if excessive humidity persists and moisture remains sealed under layers.

8 Essential Best Practices for Painting in Humid Conditions

Tips for Painting in High Humidity

To overcome the obstacles of humidity, painters must take proactive measures both before and during painting. Following these essential best practices will help minimise the risks of high moisture ruining paint jobs. Here are some key tips:

  • Monitor weather forecasts and pick times with low humidity/rain to paint outdoors
  • Use high-quality latex paints and oil-based primers
  • Ventilate indoor painting areas well — open windows or use fans.
  • Run dehumidifiers in humid areas before/during painting
  • Ensure all surfaces are completely dry before painting
  • Follow paint manufacturer’s recommendations for drying times between coats
  • Control temperature and humidity for indoor painting, ideally around 50% humidity
  • Pay close attention to humidity levels, as this is the main cause of paint issues
  • Take all of these precautions very seriously for best painting results

Follow these comprehensive tips from the residential and commercial painting experts at A One Korean Painting when tackling humidity:

Monitor the Weather

Monitor weather forecasts daily and only paint when hot, dry conditions under 50% humidity are predicted consistently. Avoid painting in high humidity above 50% which risks moisture-related problems. Ideal painting conditions are 40-50% humidity or lower.

Use Moisture-Resistant Paint

Invest in top-tier exterior latex paints designed to resist moisture absorption and loss of adhesion far better than lower quality or oil-based paints. The acrylic resins in latex paints resist swelling and delamination from humidity.

Apply a Primer

Prime surfaces with an oil-based primer which seals porous exteriors and acts as a protective barrier against ambient moisture penetrating into the substrate. Oil-based primers prevent water damage to paint layers.

Choose the Right Time of Day

Plan to paint in the mornings through early afternoons and avoid later evenings when humidity typically rises as temperatures drop. Analyse daily humidity patterns to discern the best low-humidity painting times.

Keep Surfaces Dry

Utilise moisture metres to check for dampness. Allow ample drying after rains or washing. Use fans, heaters or dehumidifiers if needed to fully dry surfaces before painting. Never apply paint over damp or wet surfaces.

Increase Ventilation

Actively circulate air when painting indoors via high-velocity fans in windows, keeping doors open, and running HVAC systems. Robust ventilation decreases humidity and removes solvent fumes.

Use a Dehumidifier

Keep large-capacity dehumidifiers running continuously in spaces being painted to actively decrease humidity. Monitor humidity frequently and adjust dehumidifiers to maintain optimal 40-50% or lower.

Follow Manufacturer Guidelines for Drying Times

Professional Painters

When painting in humidity, the manufacturer specified drying times between coats. High humidity slows curing, so paint stays wet longer than the label states. Only recoat when previous coats are fully cured. Check the cure by gently pressing with a knuckle – cured paint will be dry and hard.

Adjust recoat times based on humidity levels to allow proper curing between coats. This prevents trapping moisture and adhesion issues. Strictly following guidelines is key for success painting in humid conditions.

Conclusion

By proactively monitoring weather, utilising quality paints and primers, and rigorously controlling humidity, you can successfully paint in hot, humid climates without issues.

The residential and commercial painters at A One Korean Painting have the expertise to overcome humidity’s challenges and deliver flawless, long-lasting paint jobs that withstand the conditions.

Contact A One Korean Painting today to discuss solutions for your next exterior or interior painting project in humid environments. With proper preparation and products, we ensure humidity won’t compromise a durable, beautiful paint finish. Call now for dedicated, professional painting services you can rely on.

Posted in Painting Guide | Leave a comment