Author Archives: Domain Bird Support

Bathroom Painting, Big ImpSmall act: Colour Strategies for Space Enhancement

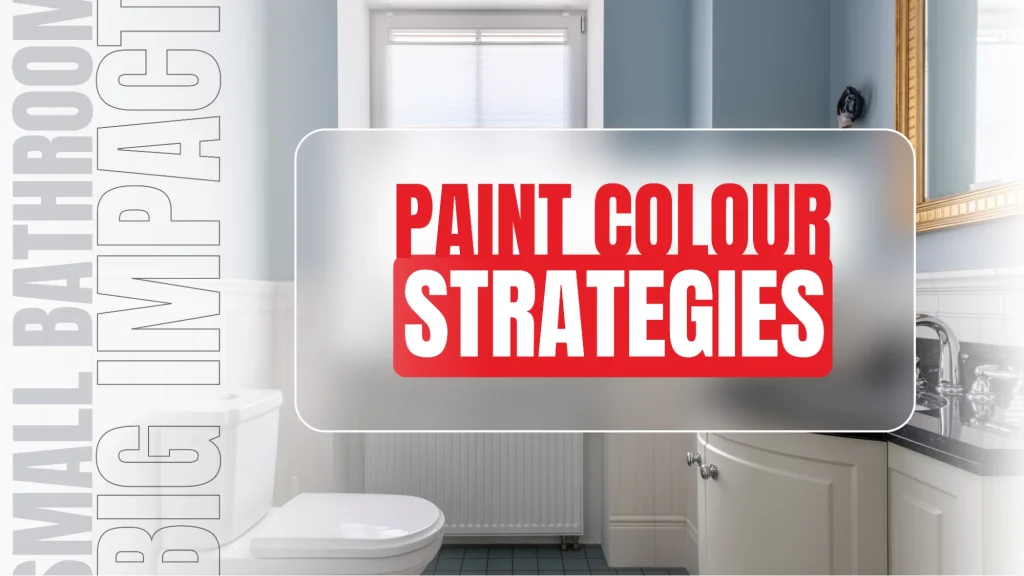
Small bathrooms, be it a powder room, guest, or main bathroom areas may feel much larger and more inviting with the appropriate and strategic paint colours.  In this blog, we’ll get into great detail about choosing paint colours and how … Continue reading

Paint Color Stratigies

Small bathrooms, be it a powder room, guest, or main bathroom areas may feel much larger and more inviting with the appropriate and strategic paint colours. 

In this blog, we’ll get into great detail about choosing paint colours and how certain shades and tones can make a bathroom look bigger than it really is. 

As you read on, you’ll learn more of the painting techniques that make space look better that go beyond just choosing the right colour, as well as professional tips on how to choose the best paint finish to make your bathroom look better and wider. 

The Psychology of Colour

Understanding colour psychology and how it affects space must be considered before choosing paint colours. Colours affect mood, emotions, and room experience. Lighter colours make a space feel bigger, while darker ones make it cosier.

Warm and cold tones can affect a small bathroom space impression. Warm colours like yellows, oranges, and reds may make a room feel cosy and smaller. Cool tones like blues and greens can make a place feel open, fresh,and therefore appear larger.

Best Paint Colors for Small Bathrooms

Different colours can work wonders in creating an illusion of space and enhancing the overall ambience of a bathroom. Here are some colours to consider for your small bathroom:

Soft Neutrals

White, beige and light grey are classic small space bathroom colours. They reflect cleanliness, simplicity, and versatility. These colours can act as blank canvas for adding colour with towels, rugs, and artwork.

Taupe is another great neutral with warm undertones. It effortlessly adds space and cosiness to your bathroom. Taupe blends with your decor to create a cosy, personal atmosphere.

Pale Blues

Powder blue, sky blue and aqua can calm a small bathroom. These colours evoke water and sky, creating a tranquil, open space.

Light blue paint works well in powder rooms and basement bathrooms with little natural light. The room can appear larger and brighter because it reflects light.

Soft Greens

Small bathrooms look cool and serene with mint, sage, and seafoam greens. Natural colours enhance space and openness when combined with daylight.

Soft green walls and ceilings offer a continuous flow and consistency. They minimise visual gaps that may make the bathroom feel smaller. These tints create a spa-like atmosphere that relaxes and rejuvenates.

Light Yellows

Light yellows like buttercream, soft lemon, and pale gold add warmth and brightness. These colours can help illuminate the area and make it feel bigger and more welcoming.

Buttercream-coloured bathrooms provide warmth and brightness to places with little sunlight. This colour is ideal for tiny bathrooms that want to feel cosy and large because it matches many decor types.

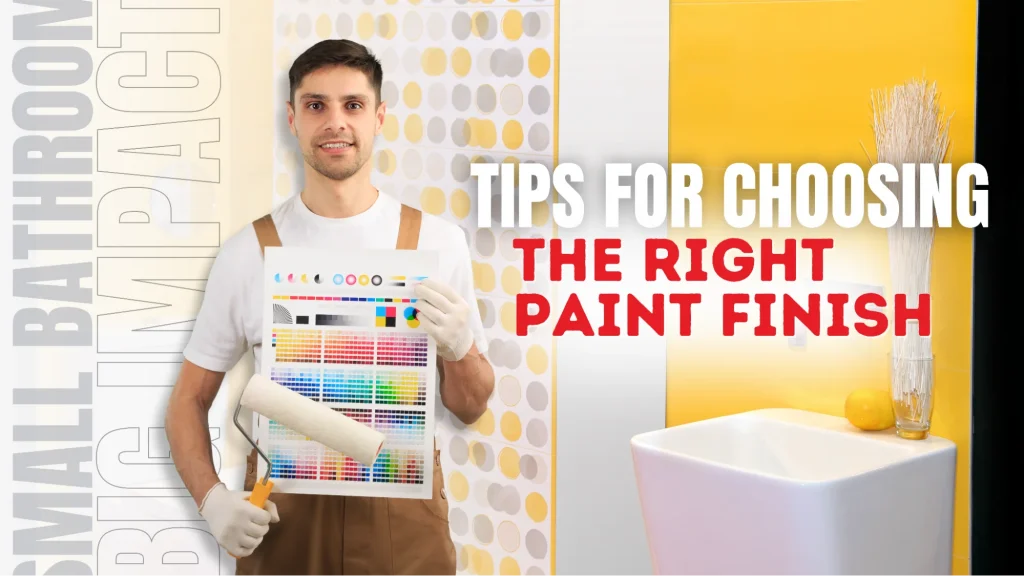
Tips for Choosing the Right Paint Finish

Choosing Right Paint Finish

In bathrooms and other high-moisture locations, paint finish is as important as colour. Here are some recommendations for choosing the finest finish for your little bathroom:

Satin Finish

Due to its superior qualities, satin finishes are ideal for high-moisture surfaces. This finish gives a velvety gloss and makes cleaning easy. 

It resists dampness and stains well. Satin finishes look luxurious and inhibit moisture damage, extending the life of the painted surface. Overall, satin finishes are practical and attractive for moisture- and stain-prone regions.

Semi-Gloss Finish

Semi-gloss finishes are durable and moisture-resistant. They’re ideal for bathroom walls. This finish is good for humid areas since it can endure moisture. 

Its smooth surface makes it easy to wipe clean, keeping walls shiny even in moist spaces. Semi-gloss finishes improve bathroom walls’ appearance and longevity.

Eggshell Finish

Eggshell finishes are flexible because they have a delicate gloss and are durable. It’s ideal for moderate humidity because it’s moisture-resistant and attractive.

It hides defects better than higher gloss choices, creating a smoother, more attractive appearance. Eggshell finishes make surfaces look good and stay longer in moderately humid situations.

Matte Finish

Matte surfaces provide a subtle appearance and are perfect for less visited areas. Because matte coatings are prone to discolouration and moisture, regular bathroom maintenance may be necessary. Low-moisture areas are the best places to utilise matte paint for durability and improved appearance.

Painting Techniques to Enhance Space

Beyond picking the proper paint colours and finishes, various painting techniques can visually extend your little bathroom:

Vertical Stripes

When painted on walls, vertical stripes provide the illusion of height in a bathroom, making it feel larger and airier. 

To create the desired impression without overwhelming the room, choose modest and tonal stripes. Vertical stripes can visually increase the room’s height, making it feel larger and more open, especially in tiny bathrooms.

Horizontal Stripes

Horizontal stripes on walls visually widen the bathroom, creating an open feel. Select a colour palette that complements each other and maintains stripe width uniformity to accomplish the desired effect seamlessly. 

This technique guarantees that horizontal stripes provide aesthetic appeal and create a harmonic and visually balanced setting.

Monochromatic Palette

A monochromatic colour palette in your bathroom design can blur boundaries, create a sense of movement, and make the space appear larger and more integrated. 

You can build a balanced blend that enhances the aesthetic and expands by mixing tones from the same colour family. This smart use of a monochromatic scheme adds visual interest and creates a unified and harmonious ambiance, all of which contribute to your goal of making your bathroom look wider than its supposed size.

Final Thoughts

Light neutrals, soothing blues, light greens, and bright yellows can all help make your bathroom space feel airy and larger. 

Although these DIY tips and ideas can help you improve your bathroom, professional help can streamline the process and assure best results. Professional painters and interior designers can give you tailored advice in line with your personal taste and budget constraints.

A One Korean Painting provides professional painting services that meet these standards. Precision, craftsmanship, and top-quality service are our hallmarks. We guarantee a superior bathroom makeover with our skilled painters and high-grade supplies. 

Get in touch with A One Korean Painting today to see how our professional painting services can help improve your home’s interiors and exteriors!

Posted in Painting Guide | Leave a comment

How Much Does it Cost to Paint Your Sydney Home Per Square Foot?

Painting one’s home is an exciting stage of home building. You get to choose which colours and patterns you’d like to put in your rooms. You can also brainstorm with family members on a theme or vibe that you’d like … Continue reading

Cost to Paint your Home

Painting one’s home is an exciting stage of home building. You get to choose which colours and patterns you’d like to put in your rooms. You can also brainstorm with family members on a theme or vibe that you’d like to achieve in a room.

But not needless to say, it does come with costs which may not be that easy on the wallet.

A new coat of paint can do wonders for improving your living area. It will definitely revitalise your house. It can also potentially raise its curb appeal and value.

It’s important to know the costs involved in painting before you start a project. We’ll go into the finer points of Sydney painting costs in this post and offer guidance to assist you make wise choices.

What Determines House Painting Cost in Sydney?

When planning to paint your house for the first time or when you’d like to repaint or revamp your house, you will need to think about the budget first and foremost.

The total cost of painting your house depends on a number of factors, including:

Labour

Expert painters are essential to getting a perfect finish. Their experience has an impact on the project’s cost and quality. You also have to consider the number of days your painters will need to work on your project. If you can consult with experts on the duration of time needed to paint a bedroom, lounge, or any certain area in your house.

Materials

Your budget will be affected by the type of paint you select, such as latex, oil-based, or specialised finishes. The cost is further increased by additional supplies. It includes priming, brushes, and rollers. Get the right materials for your intended project to ensure an efficient painting process. Also, make sure that the costs are properly liquidated.

Condition of the House

Surface preparation, repairs, and pre-existing damage all have a big impact on the price. A well-kept home may need less maintenance than one that has seen a lot of damage. You can have any areas fixed before deciding to paint so that you can save on repair costs. Anyway, you can always do the painting once you have the budget ready.

Breakdown of Cost

Let’s examine what Sydney homeowners should budget for painting services. The following are more costs to consider:

Your Home’s Dimensions and Design

Two important factors are the overall space footage and the layout intricacy of your property. Naturally, larger homes need more paint and labour hours. You can use an online paint calculator to get an approximate idea of the required paint for your space. Furthermore, cost increases may result from elaborate designs or multiple rooms. You can opt to paint your house or rooms by parts, depending on your set-aside budget.

Paint Type and Materials Used

Selecting the proper paint is important. Oil-based paints give durability. Although latex paints are more common due to their simplicity of use and rapid drying time.

Specialty finishes cost more, including paints with textures or metallic accents. Choose a reputable hardware for your purchases. You can ask the painters or you can personally choose the materials.

Sydney Labour Costs

Professional painters in Sydney currently bill $20-$30 on average per square metre. Others charge on an hourly basis that can go up to A$100 per hour.

But always remember that prices can go up or down depending on the project’s complexity, location, property size and type, etc.

Additional Costs to Keep in Mind

Preparatory Work Needed

Think about the costs for pre-painting work. A smooth canvas for painting is ensured by sanding, repairing, and priming surfaces. There are expenses related to these preliminary actions.

Special Finishes and Textures

A custom finish, including imitative textures or enhanced effects, improves the visual appeal of your house. They do, however, come with extra costs. Talk to your painter about these choices.

Flat Finish:

  • Least Shine: Flat paint finishes have a minimal sheen that makes them ideal for hiding minor surface imperfections.

Matte Paint Finish:

  • Slightly more durable than flat finishes due to a subtle sheen.

Eggshell Paint Finish:

  • The most common choice for interiors
  • Offers a soft, velvety appearance.

Satin, Velvet, and Silk Paint Finishes:

  • Ideal for high-traffic rooms.
  • These finishes strike a balance between durability and sheen.

Oil-Based Paint:

  • Professional Choice: Often used by professional painters.
  • Hard Finish: Provides durability and water resistance.
  • Stain Blocking: Excellent for stained surfaces and bleeding woods.
  • Longer Drying Time: Takes up to 24 hours to dry completely.

Cost-Saving Tips for Home Painting

Cost Saving on Painting

Know When to DIY vs. Hiring Professionals

Assess your abilities and the project’s scope. Simpler rooms or smaller touch-ups might lend themselves to a do-it-yourself project. Professional painters are well worth the investment for larger areas or more complex patterns.

You can also ask for the advice of professionals in case you are uncertain on the preparation or kinds of paint to use. At A One Korean Painting, we offer an obligation-free consultation service.

Set a Budget for a Painting Project

Make a detailed budget that accounts for all possible expenses. Make sure you budget for labour, supplies, and any unforeseen costs.

A project with a well-planned budget guarantees success and prevents financial surprises. Keep within your budget and ask around for the hardware that has the lowest prices for more savings!

Conclusion

Colours make or break our house. We not only increase the aesthetic value of the house when we choose the right colours. We also make it a beautiful place to live in.

However, keep in mind that there are other factors to take into account while organising your painting project at home. Worth, durability, and the delight of a well-painted room are all important.

A One Korean Painting is ready to help you with all your painting needs! You can let us know of your ideas and we will give you a quotation for FREE. We will even make suggestions during the consultation process. If you are looking for the right home painting solution, then A One Korean Painting is the perfect painting company for you.

Contact us today and speak to a professional Sydney painter near you!

Posted in Painting Guide | Leave a comment

Prep Like a Pro: Essential Steps Before Painting Your Kitchen Cupboards

Kitchen cupboards are among the kitchen furniture that we use the most and take up space in the kitchen. If you’re planning to revamp your kitchen and repaint your kitchen cupboards, read this article and learn more! Admit it, paint … Continue reading

image 5 1 | Prep Like a Pro: Essential Steps Before Painting Your Kitchen Cupboards | A One Korean Painting

Kitchen cupboards are among the kitchen furniture that we use the most and take up space in the kitchen. If you’re planning to revamp your kitchen and repaint your kitchen cupboards, read this article and learn more!

Admit it, paint jobs can be very messy and time-consuming. Imagine painting parts of your home with children and pets running around or during a time where there are errands and some cooking that you need to do in the kitchen.

That is why it is important to take essential steps before painting your kitchen cupboards. Do it stress-free!

Step One: Get the Kitchen Ready

Clear Everything Out

If you have several kitchen cabinets to paint, you can paint one section or select a few cupboards first. Set the time frame for the paint job and see if you can manage to paint all the cupboards and dry them in time.

Clear out everything that’s in the cupboard to avoid damages to food and interference while you are working.

Safeguard Your Surfaces

Using a newspaper and some tape, shield the areas that do not need painting. Cover nearby furniture, counters and floors. You can use a drop cloth to conveniently shelter bigger areas and some newspapers to protect breakables.

Accordingly, make sure to choose between a roller and a paintbrush. Paint brushes will give you more precision when painting small areas and corners.

Establish a Painting Station

Choose a dedicated painting station before you start.

It will help streamline the procedure and assist you in maintaining organisation. Place a drop cloth on the floor and arrange your paint supplies on a table. Make sure there is adequate lighting and ventilation. To avoid mishaps, store your paints, brushes, rollers, and cleaners close to hand but out of the way of foot traffic.

Step Two: Disassemble Cabinets

Remove and Organise

Take out the shelves, drawers, and cabinet doors first. Gently remove the hinges with a screwdriver or drill. To help you remember where each part goes, mark each piece with a marker and masking tape. You’ll save time when reassembly goes this way. Organise the cabinets according to which ones will be painted with what colour.

Secure and Store Fixtures

After that, take off the pulls, knobs, and other hardware. If you intend to repurpose them, clean them. Otherwise, put them aside if you’re upgrading your hardware. Labelled bags should be used to store these items to avoid confusion or loss.

Step Three: Thorough Cleaning

Eliminate Grease and Grime

Grease and dirt buildup on kitchen cabinets over time needs to be cleaned off before doing the paintwork. To completely clean the surfaces, use a scrubbing pad and a degreasing chemical. After giving them a quick rinse with water, let them air dry.

Detailed Surface Cleaning

Pay close attention to any places where grease accumulates, such as around handles and corners. For detailed work and to get into nooks and crannies, use a tiny brush or an old toothbrush. It’s important to have a clean surface before applying the primer and paint for stronger paint adhesion. So clean every corner and remove even the slightest dirt.

Step Four: Surface Preparation

Apply Deglosser

If the finish on your cabinets is shiny, use a clean rag to apply a deglosser. It will improve the adhesion of the fresh paint. It will also help extend the lifespan of your paint and retain its paint quality. As advised by the manufacturer, wear gloves to safeguard your hands.

Fill Screw Holes

Wood filler should be used to seal any holes left by replacing hardware if the new components don’t fit the original ones. After the filler dries, sand it down to get a flat surface. It ensures you’ll have a smooth painted surface for a clean look and final product.

Sanding for a Smooth Base

Use fine-grit sandpaper to sand the cabinet boxes, doors, and drawers. Wood is not always smooth so an added smoothening and polishing will do wonders to the kitchen cabinet. It’ll also make your paint and primer adhere effectively by smoothing out any rough areas. Dust off the surfaces by wiping them down with a tack cloth.

Step Five: Apply Primer

Down to the fifth step, select a primer that works well with the kind of paint you’ll be utilising and the substance of your cabinets.

There are different kinds of primers to choose from in the market. Ask your local hardware representative for assistance in choosing the appropriate one for your project. Start by priming the backs of the doors and drawers using a brush or roller then allow it to dry.

Step Six: Final Touch-Ups

Smooth Out with Sanding

Sandpaper is the key when you feel like the wood is not smooth or there are areas that need to be evened out. Use fine-grit sandpaper on the surfaces once more after the primer has dried out. It’s a process that’ll produce a smooth base for the final paint job by eliminating any drips or flaws.

Seal and Smooth

Sometimes, when doing some cabinet repairs and replacing the knobs, it leaves some unwanted holes or unflattened areas. For this, seal any joints or spaces, and use spackle or wood filler to cover any residual flaws.

After they are dry, sand these areas smooth. Brush off or use a hair blower to remove unwanted debris once you are done with smoothing and sealing.

Conclusion

Although refinishing cabinets is a meticulous procedure, you could achieve a stunning, long-lasting finish with patience and diligence. Always remember to take your time, and don’t rush the drying processes. Your newly refinished cabinets will give your room a renewed, almost brand-new feel.

Follow this easy step-by-step pro guide on how to paint your kitchen cupboards to ensure you achieve the desired results!

If you require any additional information or need professional assistance, our A One Korean Painting team is at your prompt service wherever you are in Sydney. Call to one of our professional painters today for a FREE project quote!

Posted in Painting Guide | Leave a comment