Category Archives: Painting Guide

Get helpful tips from experts for residential and commercial painting. From color palettes to DIY hacks, elevate your space with our insightful blog.

Concrete Roof Tile Paint: Best Options for Longevity and Style

You can definitely paint your concrete tile roof. In fact, it is a great way to enhance your roof’s appearance and safeguard it from the hovering adverse elements. However, you must pick the right Concrete roof tile paint Only then … Continue reading

concrete roof tile paint

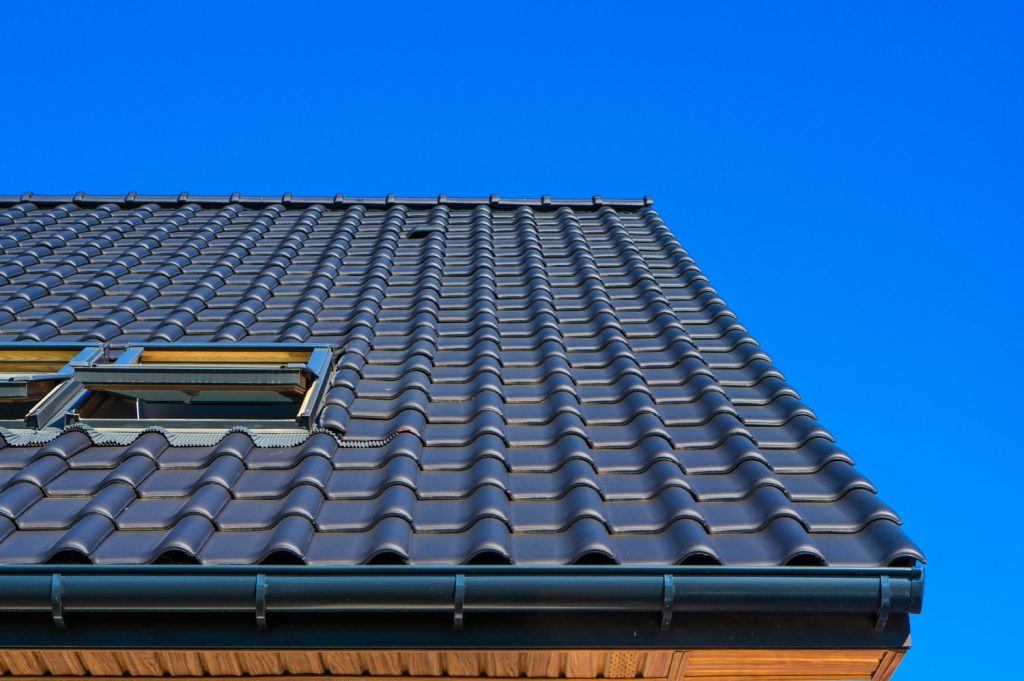
You can definitely paint your concrete tile roof. In fact, it is a great way to enhance your roof’s appearance and safeguard it from the hovering adverse elements.

However, you must pick the right Concrete roof tile paint Only then you can create a visual allure that complements your style while ensuring lasting beauty.

Let’s talk about concrete roof tiles, and proper techniques and the best types of paint for your roofing project.

Understanding Concrete Roof Tiles

Concrete tiles are primarily made of water, cement, sand and the chemical combination of iron and oxygen. Together these elements create a durable product that can imitate the strength and appearance of any other roofing materials.

In particular, the inclusion of iron oxide in the manufacturing process produces vibrant colours in the tiles, allowing them to harmonise with different architectural styles.

Concrete roof tiles are popular for their weight, sturdiness and thermal properties. They can withstand intense weather conditions like harsh winds or extreme heat, making them a reliable choice for a lasting roofing solution.

Their significant weight also offers exceptional structural support while their thermal properties minimise heat transmission between spaces.

Common Issues

Concrete tiles tend to take in water when they’re not treated thoroughly. Without protective coatings, any moisture can easily seep into the material resulting in moss growth or surface wear.

And since concrete tiles are heavier, the existence of water adds more pressure to your home’s structure that can result in serious foundational problems.

Over time, their patterns and designs will also start to fade, as a result of constant exposure to harsh environmental conditions.

Thus, despite durability, these tiles require maintenance. While they’re resistant to environmental factors, they still endure tough conditions that can wear them down.

Importance of Concrete Roof Tile Paint
Importance of Roof Paint

A freshly painted roof gives your property a stylish refresh and provides lasting protection against adverse weather conditions.

Protection Against Elements

With increased exposure, rain and UV rays gradually break down your roofing material, prompting it to age.

Fortunately, paint has insulating properties that add an extra layer of protection over its foundational material. When the temperature fluctuates, it provides a thermal barrier, preventing hazardous elements from doing damage like moulding or rotting.

Instead of replacing your roof, you can save money by simply repainting it every time the paint begins to degrade.

Aesthetic Appeal

An ageing roof is not only dangerous, but it’s also unattractive. Painting ensures you have a good-looking roof all year round. With plenty of colours available, you can enhance the visual appeal of your home and raise the value of your property. If you’re thinking of selling your house in the future, we highly recommend roof coating.

Types of Roof Paint Suitable for Concrete Tiles

Don’t just grab and use any paint. Concrete tiles are quite tricky to deal with since it’s a porous surface, requiring proper tools and techniques and a whole lot of time to get through.

But even though that’s the case, sprucing up your concrete with paint will surely make your otherwise dull roof pop.

Acrylic Roof Paint

Acrylic paints are excellent concrete roof tile paint because they’re flexible and UV-resistant. When the temperature drops or increases, they expand and contract without cracking or peeling.

This type of paint is also effortless to use; you can apply it with a roller, sprayer or brush, which makes it a suitable option for both professionals and DIY enthusiasts.

Some recommended brands specifically designed for stronger adhesion and a lasting finish include Behr, Lanco’s White-Seal, Gardner’s, Benjamin Moore and Sherwin-Williams.

Elastomeric Roof Coatings

Elastomeric roof coatings may be a paint-like liquid, but they’re actually thicker than most standard paint. 

With elastomer properties, these coatings are made elastic, meaning they can maintain their original form without being deformed despite varying temperature.

They’re waterproof, UV resistant and solid, well-suited for areas with heavy rain or extreme weather conditions and can aid cooling.

Anti-Fungal and Anti-Moss Paints

This concrete roof tile paint is formulated to discourage growth on roofs. It has chemicals that stop moss, fungus and algae from thriving on your roof and causing damage and discolouration.

Specialised paints like this one can help homeowners prolong the lifespan of their roofs while keeping their appearance pristine. 

Choosing the Right Colour

Your roof is an expansive visual element, truly visible from the outside. Therefore, choosing the right roof colour is such a big commitment that can impact the overall appearance of your home. But don’t fret; we got you! Check out our top picks for concrete roof colours.

Light vs. Dark Colours

Light and dark colours are both advantageous as roof paint for concrete tiles. For instance, light hues, such as white and soft pastels, reflect light and can keep your home cooler during the scorching summer. Then again, they catch dirt and stains fast as well, which means more maintenance work for you.

Consequently, dark shades like deep reds, dark greens and charcoal, provide aesthetic depth. From the outside, these colours conjure an illusion of shape and dimension.

And because they’re dark, they tend to hide dirt better and absorb more heat. This means less maintenance and excruciatingly hot days during the warm season.

Colour Trends for Roofs

So, what are the most popular roof colours for the Aussies these days? Well, Australians love colours trends that are both classic and conventional.

For the modern architectural look, they prefer neutral tones such as soft grey, charcoal and off-whites, veering toward minimalist design with clean lines and simplicity.

Additionally, saturated hues like forest green and black contribute to a more sophisticated modern look.

When it comes to traditional homes, think colours like earthy browns and terracotta, which are warm and organic. 

Lighter shades like grey and beige are also becoming favourties, specifically in hotter regions, where thermal insulating properties are really important.

Preparation Before Painting

Surface Cleaning

Cleaning concrete tiles is an important step before painting. As we say, paints don’t stick to dirty surfaces. That’s why you should blast the dirt, mould or any particles on the surface so as not to compromise your paint’s adhesion and result in premature peeling.

You can use a non-abrasive cleaning solution to polish your surface. And before you move on to the next step, make sure that your roof is absolutely dry.

Repairs and Priming

If you see any damaged tiles or cracks, fix them before the paint application. This is necessary to ensure an even and smooth surface and prevent further decline.

Once you’ve sealed all the cracks and replaced all the damages, apply a primer to strengthen your paint’s adhesion. It’s especially important when there’s an existing colour and you want to transition to another shade or when your concrete tiles haven’t been painted yet.

Application Techniques

For the job of painting your concrete tile roofs, here are the tools you need to prepare:

• Brushes (to paint intricate, smaller spaces)
• Roller (to cover large areas efficiently)
• Paint sprayer (to even out application)
• Plastic sheets or drop cloths (to protect your furniture and floor from paint splatters)
• Paint tray
• Roofing paint
• Ladder

Step-by-Step Application Process

As we mentioned, painting your concrete roof is a knotty assignment. Expect that you won’t be just slapping new colours—here’s a dose of reality of what you’re about to face.

• Deep clean your roof. That means getting rid of anything that’s stubbornly clinging to it.

Patch any spot that has any crack or damage. You want to fix those to ensure your roof finishes in great form.

Mask the surrounding areas, like your walls, that you don’t want to be painted on.

• Put your first coat of top-notch primer.

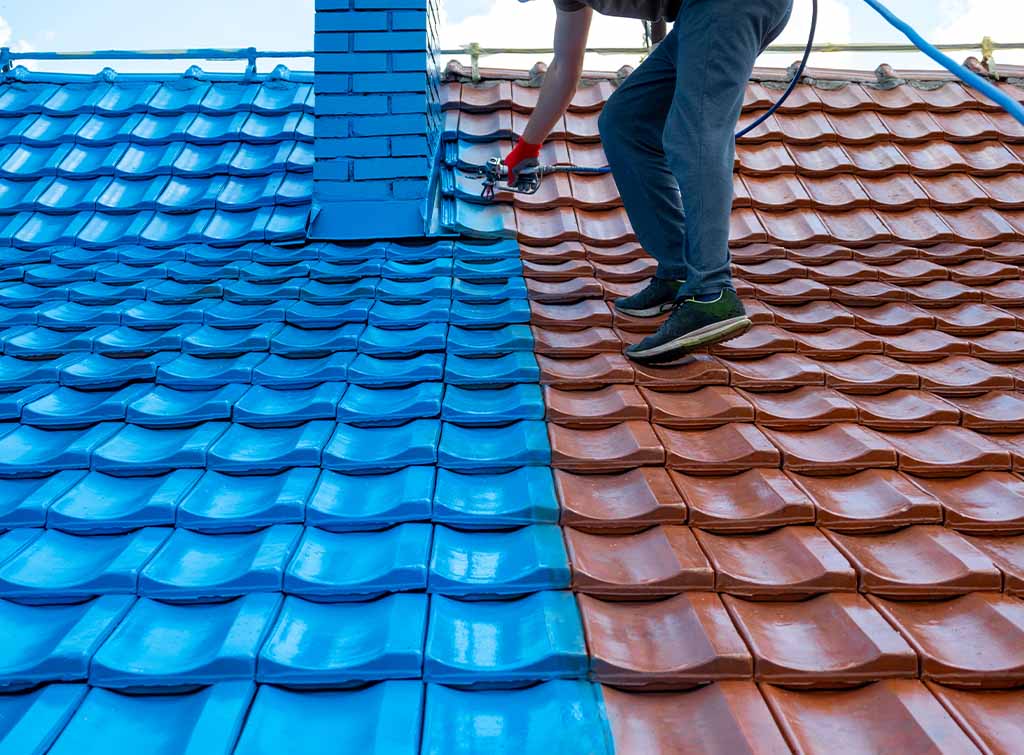
• Apply your chosen roof paint for concrete tiles, starting from the top all the way down.

• When the first coat has totally dried, spread your second coat of paint for better coverage and protection.

Maintenance Tips for Longevity
Roof Painting Services

Regular Inspections

Early detection enables timely interventions. Your proactive routine inspections will prevent any further deterioration of your roof and enhance the durability of your paint.

Cleaning and Touch-Ups

Clean your painted surface regularly. You can use a soft brush or a pressure washer (low) for cleaning. You can also perform touch-ups on your newly painted roof to hide small surface defects and restore your paint’s protective barrier.

The Bottom Line

Roof paint for concrete tiles is worth the investment. It will not only enhance the visual appeal of your home but also serve as a shield from harmful environmental elements.

However, if you want optimal results, you must choose the right concrete roof tile paint for your residential or commercial space. Top-notch paint products look good and last longer. They can maintain the integrity of your roof and enhance your property’s value and style.

If you need the right painting expert to guide you through this process, A One Korean Painting has a team of professionals trained and experienced to take on any painting project.

Posted in Painting Guide | Leave a comment

Choosing the Right Bathroom Ceiling Paint for a Fresh Look

You hardly pay attention to your bathroom ceiling because nobody even notices it, right? Between the lighting, showers and the walls around, the detail on top is easy to overlook unless you’re looking up. Your bathroom ceiling paint is important, … Continue reading

Bathroom Ceiling Paint | Choosing the Right Bathroom Ceiling Paint for a Fresh Look | A One Korean Painting

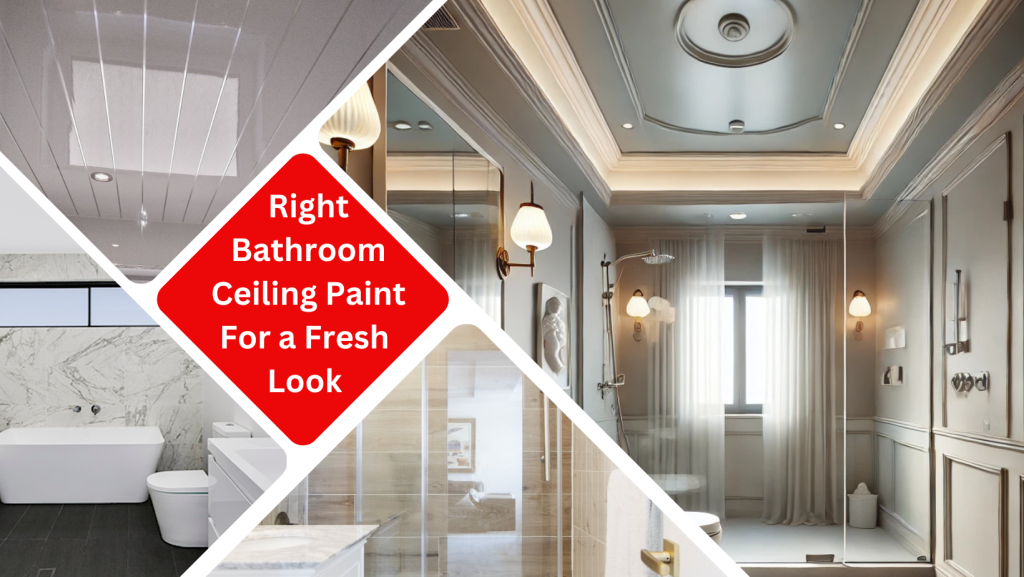
You hardly pay attention to your bathroom ceiling because nobody even notices it, right? Between the lighting, showers and the walls around, the detail on top is easy to overlook unless you’re looking up.

Your bathroom ceiling paint is important, though, in creating your dream bathroom because it impacts your water closet’s overall aesthetic and functionality.

If your paint up there is cracking and bubbling, there must be some underlying issues, such as excess moisture, telling you it’s time for a fresh coat of paint!

The right paint can elevate the look and durability in moisture-prone areas like your bathroom. It can protect the ceiling, preserving the integrity of a functional space.

Understanding Bathroom Ceiling Requirements

Giving your bathroom ceiling a fresh look is not always about beauty and visual appeal. More than aesthetics, it requires durable materials to maintain its functionality.

Moisture Resistance

The bathroom is the most humid area in your house, prone to moisture that attracts fungus and bacteria. That’s why it requires a special type of paint designed to combat steam and humidity.

There are moisture-resistant paints with antimicrobial additives created to resist the water vapour in the air and prevent the growth of moulds. These types of coatings provide enduring protection and keep the attractiveness of your bathroom intact.

Durability

Since your bathroom is constantly subjected to moisture and chemicals, use paints that can withstand frequent cleaning and deter potential mould growth.

There are washable, mould-resistant paints that don’t lose their colours, despite the humid environment. By using these high-quality products, you can maintain the beauty and cleanliness of your bathroom with a long-lasting paint job.

Types of Paint Suitable for Bathroom Ceilings

Paint Types

Here’s the thing: the paint that you use on your bedroom walls wouldn’t really work on the fifth wall of your bathroom. It’s the moisture factor. 

Here, take a look at the types of coatings that thrive in damp places, repelling water to prevent mould buildup:

Water-Based Latex or Acrylic Paints

Latex and acrylic paints are made of water, and therefore can tolerate water.

Water-based paints are easy to clean, quick to dry and resistant to mildew. They can absorb moisture without affecting their adhesion to the surface. 

For your bathroom ceiling paint, we recommend satin or semi-gloss finishes. They’re highly resistant to mould and mildew and are easier to clean. 

Also, coatings with a slight sheen reflect light, thus making your powder room look brighter and bigger.

Mould and Mildew Resistant Paints

With your bathroom being humid, it’s critical that you use paint specifically designed to prohibit mould growth that causes serious damage.

Mould and mildew-resistant paints won’t just stop water absorption but also resist dust and smog. Without mould spores flying around, air quality is improved, encouraging a healthier bathroom environment.

Flat or Matte Finishes

Another suitable bathroom ceiling paint is low-gloss finishes that reflect light. They’re ideal to disguise imperfections, creating an even, smooth surface for your bathroom’s cap.

However, flat or matte finishes take in water and are hard to clean. Although they would look elegant as your bathroom ceiling paint, they don’t do well in muggy settings and may require greater care and maintenance.

Eggshell and Semi-Gloss Finishes

Eggshell and semi-gloss finishes don’t just look good, but they’re also practical and sturdy. They’re incredibly great for bumpy and damaged bathroom ceilings.

Notably, the semi-gloss finishes can repel water and moisture, making it a smart choice for bathroom ceilings painting.

Nevertheless, these finishes provide moisture resistance and ease of cleaning. Plus, they reflect light, reducing heat absorption and making your bathroom appear brighter.

Choosing the Right Colour

Choosing the Right Colour

You can give your bathroom a nice, fresh appearance with paint in a few hours. The only thing hard about renovating your water closet is deciding the colour palettes.

Well, there’s really no science to choosing the perfect bathroom ceiling paint. There’s endless potential,though, and we’re going to help you uncover these possibilities for a bathroom space that you’ll surely love.

Light Colours for Brightness

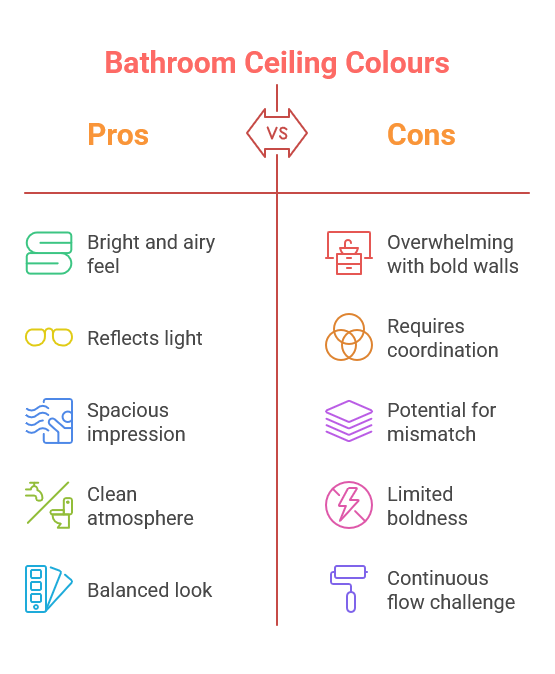
Lighter shades like white, mint green, light blues and pale grey will give your bathroom a spa-like, airy feel to it.

Since these soft tones can reflect light, they can give a small bathroom a spacious and vibrant impression. They can also create a clean and optimistic atmosphere that you can unwind in after a long day.

Coordinating with Wall Colours

Pick a bathroom ceiling paint that harmonises with the wall colours of your bathroom. This way, you can achieve a more balanced and cohesive look.

If your walls have bolder hues, try ceiling colours that are soft and lighter. This is a coordination tip so you don’t overwhelm the spaces and your senses.

However, if you want a continuous flow of colours, align the shades of your walls with your ceiling to make them more connected.

Preparing the Ceiling Before Painting

Preparation is key, especially when it comes to painting. Prep work will save you money, time and effort.

Surface Preparation

Thoroughly polish your ceiling; remove dust, grease and existing mould. These substances are barriers, stopping your paint from strongly adhering to the surface. Plus, moulds leave dark spots that result in unsightly discolouration if not properly cleaned.

You can use a sponge or a cloth and apply a mild cleaning solution to clean the ceiling, properly preparing the foundation of the paint.

Priming

For bathroom ceiling painting, priming is a necessary step to ensure the paint sticks well and produces a fantastic finish. This is a very helpful process, especially when you’re dealing with blemishes and existing paints.

Primers seal the surface, preventing the moisture from seeping in and causing damage.

But since your bathroom is a high-moisture area, you need a waterproofing primer to improve durability and ensure a long-lasting paint job.

Application Techniques

Tools Needed

The right tools make the difference between a mundane finish and an attractive paint job.

Without further ado, here are the tools that you need to gather up:

Medium cover rollers with a long nap to handle large surfaces. If you have a textured bathroom ceiling, a roller with a thick nap is much preferred.

Extension poles attached to your roller to reach higher ceilings

Angular style brushes to precisely work on edges, narrow corners and hard-to-reach spaces.

Painting Process

To effectively apply paint on your bathroom ceiling, follow these steps:

• Prepare the bathroom by removing any fixtures, covering the floor and using painter’s tape to mask off the spaces that you won’t be painting.

• Prime the surface of your ceiling and allow drying time.

• Start painting on the edges of your ceiling with your angular brush to achieve a cleaner finish and not miss a spot right before you roll the paint.

• Using the roller, paint on the edges in small sections. As you fill out the surface, do it without lifting the roller, steadily rolling the paint across the ceiling.

• When the first coat of paint has properly cured, you can apply the second coat of paint.

Maintenance Tips Post-Painting

House Painting

Proactive attention will ensure your bathroom ceiling paint will last longer, avoiding costly repairs and replacements.

Keep in mind these maintenance tips after you’ve painted your ceilings.

Cleaning Painted Ceilings

Approach this process with gentler cleaning methods: dust the surface with a feather duster or with a dry and soft cloth.

If you want a detailed cleaning to handle difficult stains, you can apply a mild cleaner to prevent scratches or damage. However, test your solution first on a small spot to make sure it doesn’t have unwanted reactions.

Regular Inspections

Check your painted ceiling for signs of peeling or moulding, as these issues occur over time due to moisture exposures.

If you see your paint cracking or blistering, there might be water under the paint. 

Regular inspection will allow you to notice and address these problems before they become bigger.

Conclusion

Your bathroom ceiling paint is not just for aesthetics; it’s a pragmatic decision to ensure the functionality and longevity of one of the most important spaces in your home.

Regular paints won’t work in a room prone to moisture; understanding that will allow you to pick the right paint that promises a clean, lasting and stylish bathroom.

So, don’t rush your paint selection process; invest time. Contact A One Korean Painting if you need expert knowledge in choosing top-notch products for sustainable results.

Posted in Painting Guide | Leave a comment

Best Trim Color for Yellow Brick Houses: A Complete Guide

The right trim colour enhances the aesthetic appeal of your yellow brick home. Explore various trim shades that work beautifully with golden bricks. Continue reading

Painting Yellow Bricks

There’s something about the iconic yellow brick houses that’s hard to overlook. Outside its pragmatic purpose, the sunny bricks have a unique charm that tells a tale of tradition, fortitude and vivid design that paved the streets for centuries.

Yellow bricks never go out of style. But to keep them stand out in the modern era, trim colours are the key.

Find out the best trim colours for your yellow bricks and make a worthwhile investment.

Understanding Yellow Brick

Yellow bricks come in a manifold of colours ranging from golden yellow and lemony shades to slight greenish. They’re durable and can resist changing weather and erosion, elevating the safety of your property.

In short, yellow bricks are a versatile and a practical choice for homeowners, like yourself.

So, how does the yellow in the bricks impact trim colour choices? Simple, by either echoing the undertones or contrasting them.

Popular Trim Colours for Yellow Brick Houses

Popular Trim Colours for Yellow Brick Houses

You will compromise the kerb appeal if you don’t choose the right trim colour for your flamboyant yellow brick.

Yellow bricks are warm and inviting, but pairing them beautifully with the perfect trim elevates the look.

Check out these popular trim colours for your yellow brick house.

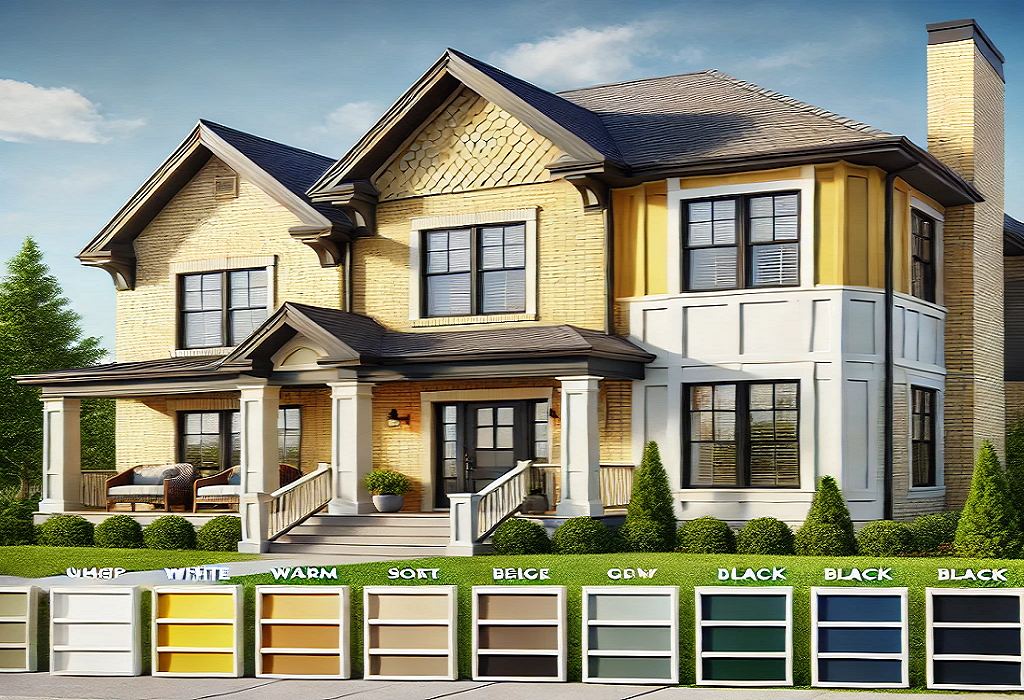
Classic White

Classic white is a timeless shade. It’s crisp and clean, contrasting the yellow bricks without overwhelming it.

The classic white emphasises the interesting pattern and the warm tone of the bricks. Whether you’re going for the softer or the brighter version, the white trim creates a perfectly balanced and appealing look.

Soft Greys

Light greys are more subtle, while medium grey is more distinct, maintaining a minimal effect that’s not overly emphasised.

The soft greys harmonises well with the sunny tone of the yellow bricks. It conjures a captivating contrast that’s elegant and inviting to anyone who sees it.

Bold Colours

Bold Colors for Bricks

Bold trim colours for yellow brick are both eye-catching and dramatic. The colour yellow is so high-energy that it creates a striking contrast to the darker shades of navy blue or deep green for a vivid trim statement.

The navy trim, for instance, matched up with softer yellow brick, has a coastal vibe that’s more organic and rustic.

Earthy Tones

Another trim colour that goes well with yellow bricks is earthy tones such as warm taupes or brown. These shades have a natural quality that grounds and complements the bricks.

Natural colour palettes blend seamlessly with the yellow brick. They’re warm and in harmony with nature, evoking a cosy vibe.

Factors to Consider When Choosing Trim Colours

Now, you will have to choose your trim colours.

What elements present an opportunity to highlight yellow bricks?

Architectural Style

The style of your home influences your trim. For instance, Victorian homes have ornate details that are intricate and imposing. They pair nicely with bold trim colours because these shades can accentuate their carefully crafted design.

On the contrary, modern homes are sleek and minimalistic. They favour trim colours that are softer and neutral, like classic white and light grey.

Simply put, the trim colours can elevate the overall style and appeal of your home if they are made to complement the architectural design.

Surrounding Environment

Strike a balance between fitting in and standing out, so you can improve the charm of the surrounding elements without sacrificing individuality.

For instance, if the houses near you are painted with bolder colours, the best way to blend in is to use neutral or muted trim. And if you live in a wooded area, go for the natural, earthy trim.

Personal Preference

The most important step to design a home that is truly yours is to reflect on your personal style. Choose your trim colours based on how you want your space to feel—without leaving out the yellow brick.

Don’t just go for the aesthetic; balance it out with what makes you feel at home. Whether you prefer a contemporary style or a more organic vibe, the perfect trim can reveal and elevate the personality of your home in the best way.

Testing Colours

Painting Bricks

Sample Applications

Before making a final decision, test the colours first in small spaces in your upcoming house painting and see what it looks like at different times of the day.

The lighting in your home can significantly affect how the trim appears. There are hues that look great in the morning but look hideous under a gloomy sky.

Thus, testing trim colours against the yellow brick is vital to ensure the palettes interact well and that they remain appealing in different lighting conditions.

Using Colour Swatches

Colour swatches are a show of different shades that you can use to perfect a match. By filtering the colours you can identify a specific colour for a certain theme.

So, how do you use swatches effectively to visualise combinations?

You can use larger samples of paint on some parts of your home and see how it works with the yellow bricks.

Put the swatches close to the sunny bricks and see how they play out together. Keep in mind that the different bands of yellow can impact the appearance of the trim.

Colour swatches are really helpful to see which hues look good or clash with other elements.

Application Techniques

Preparation Steps

Clean your trims thoroughly by washing away the dust, dirt or any flaking paint that’s sticking out. If there are imperfections like cracks or holes, fill them up and sand them once completely cured.

And if you’re working on wood or any surface previously painted, prime everything so the paint sticks better on the surface.

Remember, the paint usually fails because of poor adhesion.

Painting Techniques

Always paint with precision, using the right tools and techniques.

Start with cutting in the edges using an angled sash brush. Load the brush with paint and then paint in a fast back-and-forth brushstroke. To lay off the paint, sweep the tip of the bristle in a long stroke.

And never, ever brush across an edge to avoid paint buildup that may cause dripping.

You can apply two coats of paint for better protection and secure a good-looking finish.

For the best trim painting option, consider enamel paints. They’re not only durable, but they’re smooth and low maintenance.

Conclusion

The right trim colour can bring out the best of your yellow brick home. It can either strike a bold contrast or a compelling cohesive look that can highlight the architectural features of your sunny stone abode.

With the perfect trim pairing, your yellow brick in various shades can stand out without sacrificing individuality.

That said, homeowners, don’t be hasty with your painting project; take the time to choose colours that complement your home’s unique features.

Posted in Painting Guide | Leave a comment